
Reading Accessories Series: Part III October 13, 2023 Reading Accessory Series
Rhondi ParthemoreStep-By-Step Guide: Crafting Your Own Customized Bookmarks
Introduction
Having a bookmark for your book is not merely a fashion statement; it's a safeguard for your literary investments. While the temptation to use a scrap of paper, a tissue, or even a paperclip might arise, these makeshift solutions can lead to irreversible damage. Corner-folding and paperclips, in particular, can mar your book's pages, diminishing both its aesthetic and monetary value.
Picture this: you acquire a box of books at an auction, a treasure trove waiting to be explored. However, as you delve into your newfound collection, you discover the remnants of the past owner's careless choices – paperclips leaving rusty imprints and stains, or forgotten mementos lost between pages. These items, once cherished by someone, are now orphaned, waiting for a reunion that might never happen.
In my years of processing books for sale, I've unearthed forgotten family photos, heartfelt notes, and various keepsakes, lost between the pages and separated from their origins. It's a poignant reminder of how easily memories slip away, buried within the leaves of a book. Occasionally, I manage to trace back the origins and return these treasures, but more often, they remain disconnected, lost in time.
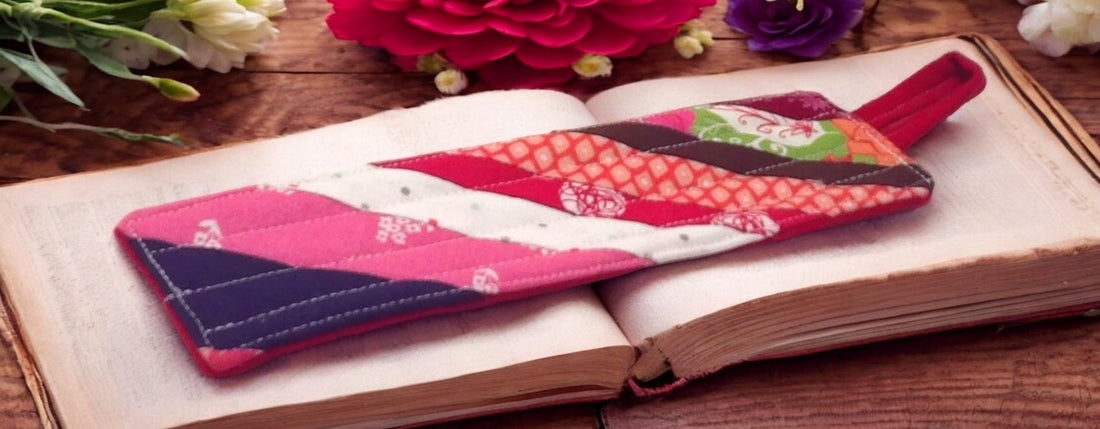
But worry not, for there’s a simple solution – the Handmade Bookmark. Crafted with fabric and inner batting, these bookmarks offer more than just a convenient placeholder. They provide structure and style, ensuring your reading experience is both delightful and respectful of your cherished books. With endless fabric choices and designs, it's an opportunity to let your imagination run wild.
Don't let your precious memories and valued books suffer the fate of neglect. Embrace the elegance and functionality of a handmade bookmark, preserving both your literary treasures and the stories held within the pages.
Step 1: Finding the Perfect Fabric: A World of Possibilities
With Joann just a stone's throw away for many shoppers or conveniently accessible through postal delivery, the world of quality fabrics is right at your fingertips. And if you think the options end there, think again. The online sphere offers an expansive array of choices, with Amazon leading the pack, providing a diverse selection of fabrics from various designers. Hobby Lobby, too, stands as a viable option, offering fabrics at reasonable prices.
But what if your budget doesn't align with these options? Fear not, for the realm of fabric is vast, and creativity knows no bounds.
Let's talk about scraps. Do you have a collection of scrap fabrics? Perhaps you know someone with a scrap fabric container – a treasure trove waiting to be explored. I can assure you, anyone who crafts or sews has a stash of these bits and pieces. These remnants, much like rabbits, seem to multiply magically, taking on a life of their own. This is your chance to dive into that treasure trove. Pull out those pieces that catch your eye. And here's the beauty of it – they don't have to match. They don't have to follow a theme. Your imagination is your only limit.
While you're at it, check for pieces of batting of the same kind and weight. A few pieces stitched together seamlessly create a perfect foundation for your creative projects. Those small pieces, Frankenstein-stitched together, are your ticket to crafting wonders.
For these delightful projects, I recommend the use of cotton fabrics, perhaps mixing in some cozy flannels. Not only are they durable, but they're also easy to clean, ensuring your creations stand the test of time.
So, whether you're delving into your scrap collection or exploring the options at your local store, the world of fabric is ripe with possibilities. Embrace the diversity, let your creativity soar, and craft your unique reading accessories, one stitch at a time.
Step 2: Embellishments: A Touch of Your Unique Style
When it comes to embellishing your bookmark, the choice is deeply personal, and the possibilities are as vast as your imagination. How fancy or simple do you want to go? Are you leaning towards something quirky or perhaps a themed design?
Consider adding a touch of lace to the edges for a romantic feel, a delicate addition that looks exquisite tucked into the pages of that new romance novel you’re eager to read.
Now, let's talk about the pull top. What about using ribbon? Should it match the fabric, create a contrasting effect, or maybe cording would suit your design better? The length of the ribbon or cording is another creative choice. Do you want it just long enough to open the book to your current reading page? Or do you need a reference point for earlier or later pages? In the latter case, make the ribbon or cording long enough to reach those pages, extending gracefully to the bottom of the page.
Alternatively, simplicity can be its charm. Utilize scrap fabric creatively. A length of approximately 4-5 inches and a width of 2.5 to 3 inches can craft a perfect pull tab that harmonizes seamlessly with your bookmark.
However, a word of caution: avoid using embellishments with dimension, such as buttons, bling gems, or metal studs. While they might add visual appeal, they can potentially damage the delicate pages of your book.
Remember, your bookmark is not just a placeholder; it’s an expression of your unique style and creativity. Let your choices reflect the joy of reading and the delight of crafting, creating a bookmark that’s not only functional but also a beautiful reflection of your personality.
Step 3: Sewing Techniques
Creating bookmarks is surprisingly simple, requiring minimal tools yet resulting in a high-quality product that proudly showcases your individuality. When you present your finished creation and your family and friends inquire, "Where did you get that?" you can confidently respond, "I made it myself!"
While having a domestic sewing machine makes the task easier, it’s not an absolute essential. Simple needle and thread or floss work just as effectively.
Supplies and Tools:
- Fabrics of choice
- Batting or heavy-grade iron-in interfacing
- A pair of scissors
- A cutting mat with measurements or a tape measure
- A rotary cutter (optional)
- A straight edge ruler
- Used dryer sheets (secret ingredient!)
Step 1: Cutting and Arranging Strips
Begin by cutting your scrap fabrics into strips of varying widths. The lengths of these strips will depend on the orientation you desire for each piece on the dryer sheet. The only rule: avoid placing identical fabrics side by side. Let your creativity run wild - mix and match contrasting colors and tones for added visual interest.
Step 2: Assembling the Block
Place your fabric strips right sides together and sew a 1/4 inch seam. Finger press open and pin into place to lie flat. Repeat this process until the entire dryer sheet is fully covered.
Step 3: Trimming and Pressing
Trim excess fabric using the dryer sheet as your guide. Turn the finished block over and admire your work. Press the block flat, being careful not to distort its shape.
Step 4: Finding the Center
Measure the narrow width of the block to find the center or simply fold it in half and press to create a crease.
Step 5: Cutting into Halves
Cut the block in half along the creased center line using either scissors or a rotary cutter and straight-edged ruler. Measure the two halves for length and width.
Step 6: Preparing Batting and Backing
Cut batting and backing fabric to match the size of the two pieces of the block that you have cut into halves (you'll need two pieces of batting and two pieces of backing fabric).
Step 7: Assembling the Bookmark
Place your stripped block pieces on top of the batting or interfacing with the right side facing up. Next, place your backing fabric face down on top of your block fabric. Pin the sides and bottom, leaving the top 1/3 free for turning down.
Step 8: Creating the Pull Tab
To make a pull tab from fabric, cut a rectangle measuring 3 inches x 5 inches. Press the fabric lengthwise in half and then press each side so the outside edges are laying next to the center creased line. Fold this in half and top-stitch close to the open edge to close. Turn and top-stitch along the other side for matching stitching.
Step 9: Attaching the Pull Tab
Fold back the backing fabric to expose the block fabric. Mark the center of the layered fabric/batting with a pin. Pin one end of the tab close to the center, offsetting the other end slightly and pinning it next to the first pinned end. The raw ends should be next to the edge of the block, and the loop will be pointed toward the inside, toward the bottom. Carefully top-stitch very close to the edge of the top to secure the ends, backstitch, and repeat. If doing this step by hand, repeat the stitch lines until fully secure. Return the backing fabric to meet with the top, covering the loop, and pin it into place.
Step 10: Stitching Around the Bookmark
Starting on a vertical side, begin stitching around the bookmark using a 1/4 inch seam. Stop stitching approximately 2-3 inches from the start of the stitching, leaving an opening.
Step 11: Turning and Finishing
- Trim the corners of the unit, carefully avoiding cutting into the stitch line.
- Turn the corners inside out (actually outside in) using a small, dull pointed chopstick or the end of a small paintbrush. Be cautious not to push through the fabric.
- Once turned, line up the edges of the front and back and carefully press with a hot iron. Steam will help. At the opened area on the side, turn the fabric in to create a seam allowance and pin it.
- Sew an 1/8 inch from the edges, carefully closing the opening and continuing all the way around the bookmark.
- Decide if you want any quilting on your new bookmark.
- For a little quilting, select three points that are equal distances from each other and sew lengthwise from top to bottom.
- For a lot of quilting: sew along each of the seams of each fabric or create a cross-hatch design. This is entirely up to you!
Repeat steps 7 through 11 to complete your second bookmark. Now you have a backup or a thoughtful gift for a friend!
Happy crafting! Your personalized bookmarks are not only functional but also a testament to your creativity and attention to detail. Enjoy using them in your favorite reads or gifting them to fellow book lovers.
Step 4: Care Tips
Your new bookmarks can be machine washed and dried. Press with steam iron to flatten again if needed.
Conclusion
Congratulations on creating your own unique bookmarks! We hope you enjoyed this creative journey as much as we did guiding you through it. Just to recap, you've learned how to transform simple scrap fabrics into personalized bookmarks, adding a touch of your unique style with various embellishments.
Remember, your bookmarks are not just placeholders; they're expressions of your creativity and love for reading. Now, we encourage you to share your creations with the world! We'd love to see what you've made. Take a photo of your handmade bookmarks and share it on your favorite social media platforms. Don't forget to tag us @ The Reading Well Handmade in your posts!
And guess what? If doing this project on your own is more than you want to devote time to, I have your covered. Check out the products in my store. All items can be made to order or customized.
Thank you for joining us in this creative endeavor. Happy crafting and happy reading! Let's spread the joy of reading, one personalized bookmark at a time. Share your creations, and let's inspire others together!"
As we wrap up this creative journey, we invite you to bring the magic of handmade reading accessories into your life. Dive into our online store, The Reading Well Handmade , where a world of pre-made handmade possibilities awaits. From vibrant pre-made reading accessories to essential additions, our curated collection is designed to enhance your reading experience.
Why settle for ordinary when you can infuse your reading moments with the charm of handmade elegance? Place your order now and let your creativity soar. Your next reading adventure deserves a bookmark as unique and special as the stories you love.
Thank you for choosing us to be a part of your creative endeavors. Let's craft a reading experience that's truly one-of-a-kind. Here's to many more chapters of creativity and imagination!